As you recall, in my 'Getting Involved!!' post, I started working on scarves for the Washington State Special Olympics 2012 program. Well, with the holidays and our wedding out of the way, I have FINALLY finished both scarves and am ready to share them with you!
I took the opportunity to try new patterns and enjoyed making both of them! The yarn I used for both was the required Red Heart Super Saver Soft Navy & Cherry Red. For the scarf below, I chose the 'Brilliant Ripple Scarf' pattern from Lion Brand. However, as usual, I changed the pattern, I used a single strand and NOT double to create the 'tweed' effect as the pattern states.
The husband likes the ripples...........
For the second scarf, I chose the 'Be Proud Scarf' pattern from Red Heart. It was one of the four provided options for this year. However, I ended up having to shorten the amount of rows in the pattern due to my width getting close to the 6" max limit.
I like this one :)
I am sure these two happy scarves are going to find their way to an even happier home! While doing this project, I was inspired to keep the contributions/donations going and participate with as many organizations as I can. I am also creating a goal of doing at least double the amount of scarves for NEXT years Special Olympics!
Considering that I have not been the faithful blogger lately, I should fire myself. Unfortunately, one of my resolutions for this new year is to be a consistent blogger. But, let's not get ahead of ourselves.....
Since my last post, MANY things have happened. Some are super exciting and some... not so much. As you know, I was planning my wedding. Well, a couple of weeks before the big day, my sweet little kitty (the one in the picture to the left), had to be put to sleep. Her old age finally got to her and it was her time. I will miss her very much.
On the brighter side of life, we are officially married!! The whole day was an amazing experience and went by SO fast! None of it could have been possible without all the friends and family involved. I do have to say, that is A LOT of work for the shortest day in your entire life...... completely worth it though!
Smile! We're married!
Next, came Christmas!! I seriously attempted to make as many gifts as I could and can't wait for this year to try all the projects that I just didn't have time for. I failed at taking pictures of most of the gifts (bad me!), but here are a couple that I DID take.
My first attempt at a marble style ornament!
My White Elephant gift!
Surprisingly, to me anyways, is that my crocheted blanket was a big hit at the family white elephant gift exchange. The pattern is 'Wavy Stripes Beach Blanket' from 'crochet today!' July/August 2011 issue. If you are familiar with the issue/pattern, I obviously changed the colors and instead of using the suggested yarn, I used Caron Simply Soft.
Finally, we are at the New Year and with every new year comes new resolutions! So, here they are:
Organize the ENTIRE house - this is ambitious, but I would LOVE to know where everything is! 2 years in to our new house and I feel like we are still moving in....
Keep up with blog - see, I can't "fire" myself!
Create an Etsy account - another ambitious item on my list! I've been intimidated to create one (still am), but you will never know unless you try, right?
Let's not forget, with the new year came a new......... PUPPY!!!
Hope everyone had a Merry Christmas, Happy Holidays, a great start to the New Year. Here's to 2012 and whatever it has to offer us!
I have become so consumed with wedding, wedding, Carson's big 2nd birthday, more wedding and Halloween that I have lost my focus on being a fabulous blogger and sharing my projects! Although, I have been doing nothing but crocheting the same table doily, that there really isn't much that is new. How boring am I?!?
It's ok, I am about to knock your socks of with the cutest Luigi you have ever seen and a couple of great birthday party shots!
My little Luigi!
Carson and Clara, (too cute!) This is probably my favorite and DEFINITELY getting framed!
Gotta love these! And kids parties! They are the best (and the most exhausting)! In the end, it was a great weekend and another milestone. It's still hard for me to believe that my sweet, precious little baby boy is now 2! I enjoy the little moments every day blesses me with because everyone was right, they DO grow up fast!
In between being EXTREMELY busy planning our wedding, I have found time to make my sweet little guy's birthday party invitations. Since his birthday is the day before Halloween, we are FOREVER going to have a Halloween theme party (unless he grows up and hates it someday)!!
I found the cards and most of the stamps at Joanns for $1.00! Crazy, huh?? The other stamps I got on sale, so I wasn't too upset about that either ;)
Note: I couldn't find the 1$ products online, so I assume it's just an in-store special.
Supplies:
Frankenstein cards with envelopes (x3)
Clear Spider stamps
'Party Time' stamp
Party Info stamp
Black ink pad
And now for the easy (and fun!) part. STAMPING!!! I used the 'Party Time' stamp for the front and the two different spiders and the 'Party Info' stamp for the inside of the invitation.
I'm going to add a current wallet sized picture of the birthday boy on the left side, then fill in the information on the right. Simple, quick and easy!
Have I been busy lately or what?!? I have surely become the absent blogger with hopes of changing that REAL soon! With our recent engagement, I have found myself mostly trying to figure things out before I dive in and get going.
For example, our wedding invitations.....took me FOREVER to come up with a design that we both liked. The man even helped me with a lot of the decision making, which is very unusual for him. As soon as I get this puncher in the mail that I have been waiting on WAY longer than the paper (and I ordered it first), I will definitely be sharing it with you! But the invitation itself will have to do for now :)
The paper and envelopes were ordered from paperandmore.com and I was VERY impressed with their site. After spending most of the day searching for invites, with little satisfaction and the fear of it costing more than I had intended, I came across their website and felt a sense of relief. You can order samples of pretty much everything on their site for a small price, shipping was SUPER reasonable AND they support the USPS (Joey, that one is for you)! Let's not forget to mention that they had WAY more options than any other site I encountered for HALF the price! So, if you are looking for anything that has to do with paper, please stop by this site, they are amazing and I will forever be using them for my mass production needs!
I shall be back REAL soon with my centerpieces for the reception, maybe even make it into a tutorial..... ;)
.....which means I have been busy :) In between preparing for a baby shower this weekend at my house, wedding preparations and being a Mommy, I've been having a little fun too! So here are a few pictures of the adventure as well as some wedding ideas that I have been playing with!
The weekend was full of football, garage sales and a frog!!
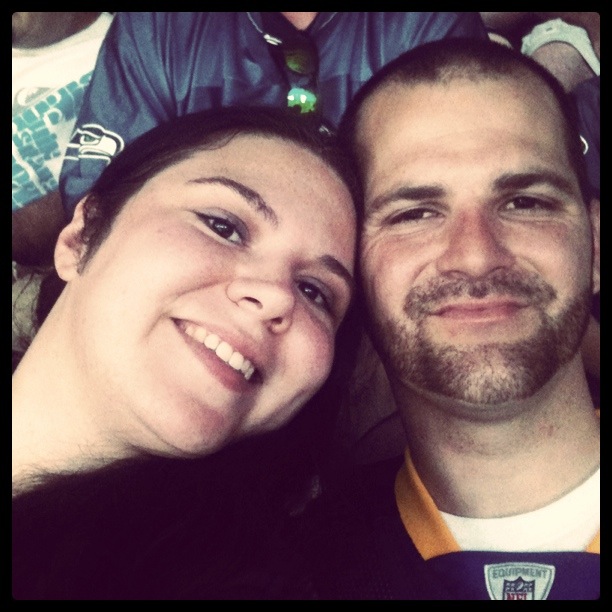
Seattle vs. Vikings (Vikings won, yay! Please note: We are obviously not a local team family. Him: Vikings Me: Jaguars)
As for that garage sale that I got up the next morning for.......yea.....not so much! Besides hanging out in the sun with good friends and family, there wasn't much business to talk about. I blame the numerous amounts of other garage sales going on in the neighborhood! Hopefully this weekend will show some success :)
Now for that frog! I have heard frogs/bullfrogs in the yard, but I have never seen any. Snakes, yes. Deer, yes. Bunnies, yes...... My little guy found him in the back yard while Daddy caught him and showed me. "Frog" was definitely the new word of the weekend!!!
Isn't it cute?!?!?
Ok, so for the fun part.....WEDDING!!!! Here are some ideas that I think I am definitely going to use, just changing each one a little bit to add my own touch to it!
click on image for source
I love the idea of using burlap! It's perfect for a fall/country wedding and somewhat fitting for me! I have a tendency to re-use the burlap rice bags from Costco as a purse ;) What? It's cute!
click on image for source
For the napkin rings, I would change the blue to either an orange or a red and I think the idea in general is SUPER cute! Again, fitting for the fall wedding!
click on image for source
I am overjoyed to find a productive use for our rusty wheelbarrow that came with the house, not that it doesn't work or anything, but let's all admit it, this is a pretty awesome idea for all the wine!
Last, but definitely not least, we have our table toppers! The soon-to-be husband likes it, I like it and think it works well with the theme......let's just hope I still like it after I make a handful or more of them!
I am truly excited (and just as stressed, in a good way) to actually be making the majority of the decorations for our wedding.... AND I am even MORE excited that the future husband is participating! I really did NOT expected that one, so I am going to soak it all up while I can.
Stay tuned for center-pieces and invitation options!
In this tutorial, I will show you step by step how I created some cute, 'woodsy' themed baby shower invitations! I made these for my dear friends (and my son's God -parents) who are expecting their first little bundle in October...EXCITED!!
I created links for the types of stamps, pads and double edge punch that I used, however, all these are optional. As with all my tutorials, my goal is to just give you an idea and let you explore your own creativity :)
Let's start with the supplies! Here is pretty much everything you will need:
Not Pictured: foam brush and glue/glue stick
Cardstock Paper (colors of choice)
Package of Cards and Envelopes (size & color of choice)
To begin, I measured and cut all the paper needed for the invitations, excluding the "info" and "directions" portions due to them needing to be printed out first.....but I will get to that :)
I also "punched" out all the leaves I would need. I absolutely fell in LOVE with this double edged punch and think that I shall be using it for our wedding invitations!
The sides of the punch are amazing and work great for lining up your vine and getting that perfect cut!
Next, I used the distress ink pad to give the "aged" effect around the malt colored paper that will be going on the front of the invitation.
Laying the malt paper on top of your freezer paper (or craft board) wax side UP, dab a paper towel on the distress ink pad and in a circular motion, work around the edge of the paper.
When learning this technique, I found an EXTREMELY helpful video that also introduced other ways to use the distress ink pad. This was AMAZING to me and made me want to get more distress pads in different colors! Below is this very same video I speak of:
Ok, so now that ALL those malt pieces are rubbed down, distressed and dried, it's time to move on to stamping them!! Yay!!
Using your black ink pad and tree stamp, dab the ink on the stamp, press the stamp firmly on the malt paper, lift and tah-dah!
Now.......... we glue!!! I started out using Elmer's in a bowl with a foam brush, but towards the end, I realized a glue stick worked a bit better. However, I did like how the glue in a bowl with a foam brush worked with the leaves. Don't worry, I will get to that one too.... :)
Brush the glue on the back of the malt paper and carefully place it on the top of the card (glue side down,, obviously), pressing down in the middle and along the edges. NOTE: Elmer's curled more than the glue stick, but eventually flattened itself out.
Next, we are going to glue the leaves using the tip of the foam brush and dabbing it along the middle of the vine.
Gently place the leaves on the top and bottom of the card (or the sides!) and using your fingers, press the vine down.
Phew! Now that all that is done, we get to move on to the inside of the card. This is were we get to use those handy dandy registry cards they received and our cute embellishments!
Let's start by using our photo corners and putting them on the edges of the registry cards. Next, place the registry card on the top portion of the inside.
I used clear photo corners, but feel free to use any color or design that you please :)
Next, using your foam brush and glue OR your glue stick, glue your powder blue piece and place it on the bottom portion of the inside.
Next, I printed and cut out all the information and direction sheets for the invitations. The wording that you use is all up to you. I shall translate the wording and poem that I used due to the pictures being slightly blurry and certain names and addresses being brushed out for privacy reasons :)
I am sure you noticed I added an extra vine in a different color.... I preferred for it to be on the left side and underneath the "it's a boy!" embellishment, but unfortunately my measurements were off and I didn't think of pulling off a leaf from the ONE area that was overlapping the text......silly me! I am still pleased with the outcome either way. The wording for the "info" section is as follows"
Alaina and Joey, always so cool;
We'll see how they look wearing baby drool
Please join us for a baby shower honoring:
Alaina LastName and Josef LastName
Saturday, August 27th @ 5:30 p.m.
Amber LastName's House
Enter Address
Here
Please R.S.V.P by August 27th
Phone: (555) 555-5555 or Email: enter email here
*Bring a box of diapers & have your name entered in a drawing to win a door prize!
(Size 2 or larger is appreciated)
Glue down your info sheet, the vine embellishment and add the "it's a boy" sticker to wherever your heart desires. Finally, place the directions sheet on top, leaving it loose in the invitation annnnnd..... you are finally done!
For my own special touches, I stamped the backs of the cards with a "Handmade From The Heart" stamp and the flaps of the envelopes with a cute little bug!
Hopefully this tutorial will inspire you to make ANY card/invitation creations of your own! Have fun with it, I know I did!!!!