ModCloth

Sunday, August 23, 2015

Baby Blanket Flower & Leaf Details ~ Chart Translation

The baby blanket is *finally* complete and I cannot wait to share it with you!
 
A few weeks back I found a crochet baby blanket on Pinterest that led me to a chart. No written pattern, just a punch of symbols.
 
 
 Well, I like a good puzzle, and even though I knew what all the symbols meant, I like to have my patterns written out.
12 pages of notes later, here we are!
 
I will be starting with the details of the blanket, the flower and the leaf.


There will be a written pattern, as well as some pictures along the way for a visual.
 
For the blanket, I used baby weight yarn with a F/5 - 3.75mm hook.
I will be using those, as well as worsted weight yarn with a H/8 - 5mm hook for examples/pictures in this post.


Let's get started!
 
 
Small & Large 6-Petal Flower
 
Small Flower:
(Make 8)
 
Start with a magic circle (a great video tutorial can be found HERE by Moogly)
 
1.  ch 5 (counts as dc and ch 2) - * dc in circle - ch 2 * - repeat from * to * 5 times - join to 3rd ch of beginning ch 5 - pull circle closed. {6 dc and 6 ch sps. total}
 
2. sl st to ch sp. - ch 1 - (sc - ch 2 - 3dc - ch 2 - sc) in ch sp - * sl st to next ch sp - (sc - ch 2 - 3dc - ch 2 - sc) in ch sp * repeat from * to * 5 times - join to beginning ch 1 {6 petals made}
 
3. ch 1 - sc in same st - working behind petals, * ch 5 - sc in dc from Round 1 * repeat from * to * around - join to first sc

 
4. ch 1 - (sc - hdc - 5dc - hdc - sc) in each ch 5 sp around - join to beginning ch 1 - FO for SMALL FLOWER ONLY - weave in ends


Large Flower:
(Make 4)

 
5. ch 1 - sc in same st - working behind petals, * ch 6 - sc in sc from Round 3 * repeat from * to * around - join to first sc
 
6. ch 1 - (sc - hdc - 7dc - hdc - sc) in each ch sp around - join to beginning ch 1 - FO - weave in ends


Light pink flower is made with baby weight yarn and smaller hook.
Dark pink and purple flowers are made with worsted weight yarn and larger hook.
 
Now that the flowers are done, it's time for some leaves!
 
Leaf:
(Make 12)
 
ch 11 - sc in 2nd ch from hook - hdc in next - dc in next 6 chs - hdc - sc in last ch (10 sts) - ch 1


continue working on opposite side; sc - hdc - dc in next 6 - hdc - sc - join to first sc - FO - weave in ends.


Pink leaf is made with baby weight yarn and smaller sized hook. Green leaf is made with worsted weight yarn and larger hook.


Please note: This pattern is NOT my own. I have written the original chart out into crochet terms to hopefully make it easier to follow. Please click the link above for the original site. If you find any problems with this pattern, please let me know in the comments below. Thank you.


Wednesday, July 29, 2015

The Beginnings of Another Chart Translation.....

You've read that correctly, I am doing it again!
 
I don't know if it was all the coffee, the long day that turned into a long night of finishing a crochet piece, or Pinterest; but either way, I found another chart that I felt compelled to translate and create.


It's a baby blanket!! And it's adorable!!
 
The breakdown, write up, and creating process has already begun.....


This one is testing my knowledge, that's for sure. *SO* glad to have all the reference books I collected over the years of estate sales and thrift shopping. Everyone does symbols differently and this one has a few tricky ones.
 

First, I stared at the pictures for counting rows and starting chains.
Then, I stared at it trying to figure out how the double row of ruffles was going to work itself out.
Finally, it was the flowers....


I am all geared up to get this started, so wish me luck! I think I may need it......


Please note: This pattern is NOT my own. Click on links provided for the original site that this pattern was found on.


Tuesday, June 16, 2015

Mario Themed Crochet Pixel Blanket - Part 2

 
We are finally reaching an end to the Mario Pixel Blanket!!
 
I have finished almost all of the squares and began weaving in those pesky ends.....
 
Big C mentioned last night how I should probably be working on this blanket, but I don't think he realizes that that is *A LOT* of ends to weave in!!


While I am off spending eternity weaving in ends, you can enjoy what the squares will eventually look like.... isn't it exciting seeing the pieces starting to come together?!


I can't wait to get this blanket finished! Not only because it is giant and extremely time consuming, but because this little boy just loves his Mario!
 
If thousands of tiny squares isn't your thing, Sarah from Repeat Crafter Me has this *GREAT* tutorial on using a continuous bobble stitch instead of squares to create the same pixel effect.
 
Check it out HERE!
 
Can't wait to try that method out for the Bowser blanket :)


Thursday, April 23, 2015

Mario Themed Crochet Pixel Blanket - Part 1

"It's a-me, Mario!"
 
 
My little muse came up with another great idea that had my gears turning in no time!!
What would I do without this guy??
 
 
He always has a way of coming up with ideas that keep me busy creating for days.....
 
His latest plan involves Mario and me making it in to a blanket.
My first thought was, "graph patterns to the rescue!!" So, I went on a mission via Pinterest and found some that I could work with.
 
Next, I searched for a mini square pattern to determine each square's size and eventually how large each graph would be.
I knew for this pixel blanket, I wanted a closed square. Unlike the granny squares I made for Little C's butterfly baby blanket.
 
 
I ended up using a 2" square from Elisabeth Andree of About Crochet.
(Pattern found HERE!)
 
The smaller square allows me to use 9 - 16x16 graphs in the blanket's finally design; or 3 stacks of 3.
 
Do you like how all the numbers are starting to come out??
My *favorite* subject EVER! (enter sarcasm here)
 
My final measurements of the blanket will be approximately 108" x 108", including a border.
That's the same as a King sized blanket!!
 
 
~~~~~*~~~~~*~~~~~*~~~~~*~~~~~*~~~~~
 

Each block/graph has 256 squares total and with 9 blocks, that's 2,304 squares *all* together......
 
 
~~~~~*~~~~~*~~~~~*~~~~~*~~~~~*~~~~~

 
Needless to say, I don't see this blanket being finished any time soon..... Maybe by Christmas??
 
 
~~~~~*~~~~~*~~~~~*~~~~~*~~~~~*~~~~~


I suppose I could make the blanket smaller, but why not go big, right??
 
The final choice of each character block was Big C's, with a little persuasion from me whenever we needed to mix up the colors.
 
There are 17 colors being used.... and let me tell you people, this is where yarn hoarding comes in handy!! Be sure to explain this to your significant others the next time they complain about you sneaking in a few more skeins ;)
 
 
I will do my best to update as I crochet along, until then, stop by Graph Patterns board on Pinterest and start getting some pixel blanket ideas of your own!


Thursday, April 2, 2015

Yoda Needs A Kimono.....

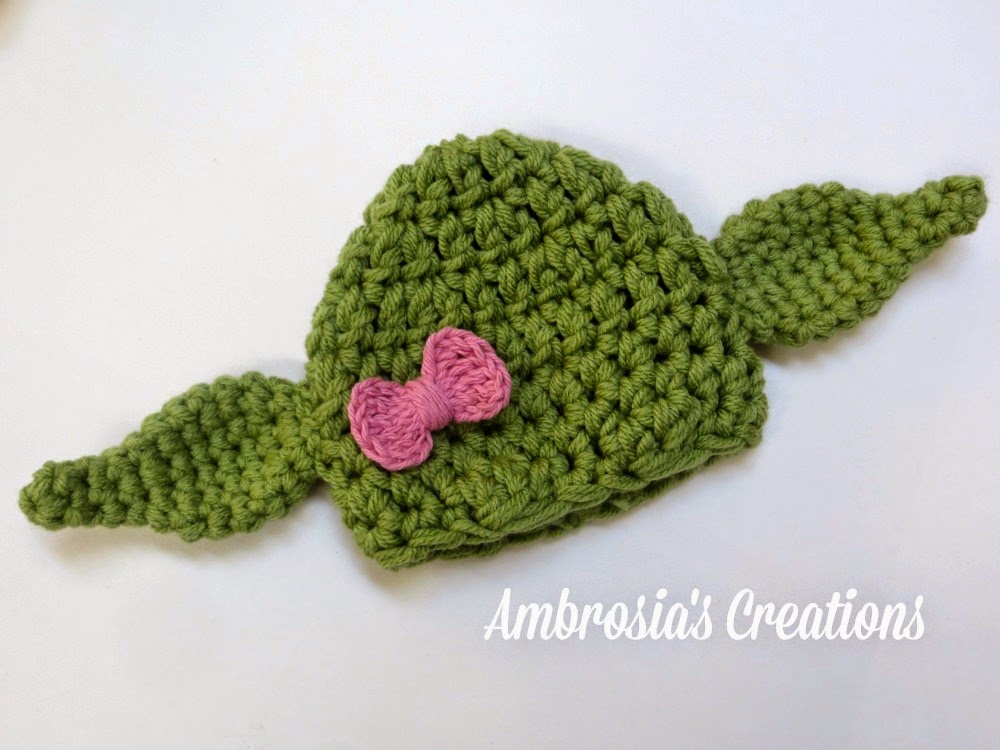
I was recently contacted through my Etsy shop for a customization of the Yoda Newborn Photography Prop and let me tell you, I was excited!!
 
The request was to completely get rid of the cape and make a Kimono sweater instead, plus, add a detachable pink bow to the hat.
Hello, challenge!!


Thankfully, Abigailology has this amazing pattern that was perfect for what the customer was looking for. Her pattern calls for a fingering weight yarn, which makes this sweater light, stretchy and super soft. I love how it turned out and I hope it's new owner will too!
 

You can find the pattern on Etsy HERE or on Ravelry HERE.


For the detachable bow, I used a favorite pattern of mine by Daisy Cottage Designs with 100% cotton yarn. I'll glue a piece of felt to the back, then glue the felt to an alligator clip. Easy peasy....
Get the free pattern for the bow HERE.
 
 
I just love how all of the pieces turned out and am thinking of making the kimono sweater an option for the Yoda Set, as well as the detachable bow.
 
What do you think?? 


Sunday, February 22, 2015

Graph Hats ~ A Comparison and Pattern Review

** I originally had this post written up a month ago but some technical difficulties with computers and drivers got the best of me. However, hats are always in season!!**

It's hat season and I have suddenly found myself addicted to graph patterns!
There are two different graph hat patterns that I have found and been working with:

Oikos Handmade and Playin' Hooky Designs, 'The Graph Beanie' 


It started with running in to a Teenage Mutant Ninja Turtle graph pattern from Playin' Hooky Designs. She had a sale on it for her son's birthday a while back and Big C *loves* TMNT, so I figured, let's give it a shot!

 
The TMNT graph pattern accompanies her base beanie pattern, found HERE on Ravelry.
** You will need the base beanie pattern before using her graph patterns. **


I have seen MNE Crafts Graph Hats on Pinterest and in the Facebook world before, even more-so lately with the addition of her Valentine's Day designs, and I loved how clean the graph transfers.

Since they are two hats using graphs in a completely different way, I decided to see which one worked best for me. 

 To start, here are some things I was looking for and comparing:
  • Difficulty in the pattern/instructions.
  • Size of graph allowed.
  • How well the graph transferred to the hat.
  • Finished Product
    • weight
    • feel/texture
    • stretch/sizing
    • appearance when worn
* Please note: The following comparison is just my experience. Extra tips or ideas regarding either of these designs is welcomed and encouraged to comment below! Size used in comparisons was a child large/adult small*

  • Pattern Difficulty:
Both patterns are fairly easy, however one ended up being easier to follow than the other due to less details involved.
 
* MNE's hat is made in the round using a front-post double crochet (Fpdc). The first 3-5 rounds, depending on hat size, use increasing stitches. Because of the increasing stitches, this means it's harder to work a graph pattern in the top portion of the hat. 

* Playin' Hooky works in rows with a back-loop stitch through-out, no increasing stitches are needed.

The simplest pattern, for me, ended up being the Graph Beanie from Playin' Hooky Designs. The pattern instructions consist of a few rows which you continue until your desired width while adding the graph when necessary.

  • Size of Graph Allowed:
This is where I found the two differed the most. One has a much smaller area to work a graph pattern than the other. 

* MNE's hat can fit a 15 X 60 graph (small adult size). This works great for smaller graphs and because the hat works in the round, you can easily carry the yarn and add the same design multiple times. 

* Playin' Hooky's beanie can fit a 27 X 63 graph (small adult size), allowing for most of the hat to be used. I felt this gave me many more design options.

Note: You can easily adjust the size of hat & graph by switching your hook size. Smaller hook = larger graph.


Online Crochet Class


  • Graph Transfer:
How well each graph transfers between patterns is a personal preference, but because each one uses such different techniques, I used the same graph with each pattern to show the difference.
One uses a front-post and the other a back-loop, not only does the appearance differ, but so does the size.
With Playin' Hooky's pattern, I was able to carry the yarn and continue using the one strand, creating less bulk and ends to weave in.


MNE's working-in-the-round design created extra padding behind the ghost and Pac-Man when carrying the yarn. You could snip the yarn at the end of each round, keeping in mind this creates more ends to weave in.


Below I used the same Pac-Man ghost graph for each pattern. The ruler shows the size difference and you can clearly see how the front-post compares to the back-loop version.

 
Which one do you choose?


  • Finished Product:

    • Weight :: MNE has a lot of bulk to it. This is most likely due to the use of the Fpdc, as well as the stitch increases in the beginning rounds. Playin' Hooky Designs has a much lighter feel.
    • Feel/Texture :: Playin' Hooky Designs use of the back-loop throughout gives their beanie a ribbed/bumpy feel and appearance where MNE's has more of a smooth line look to it. 
       
    • Stretch and Sizing :: (As stated earlier, I used the child/small adult size for both test pieces.) With the added bulk in MNE's design, I felt it didn't allow much stretch. You can see in the picture below, that it's slightly tight on Big C's head. Playin' Hooky's beanie with the back-loop not only gives the ribbed effect, but it's also very stretchy and extremely forgiving if your sizing is slightly off.
    • Appearance :: This is also a personal preference, because they both turn out amazing in the end!!! I love them both for different reasons, but more importantly, they are both addicting!!


UPDATE: MNE Crafts recently released a photo tutorial for her graph hat patterns showing different methods for carrying the yarn and sizing options. She is even starting on larger graph designs!! Check all this out in the link below:

http://www.mnecrafts.com/2015/02/graph-hat-photo-tutorial.html


So, have you fallen in love with graph hats, too?? Are you on your way to make a ton of them?!?

This is the Snowflake Color Grid made for Little C


Here are some Adventure Time designs that I have been working on, requested by Big C.


And a team beanie for when he races his BMX!


Fun, right?!?

If you are like me and can't get enough of the graph hats, check out my Pinterest board HERE, completely dedicated to graph patterns. You can easily work any of these in to either patterns, just remember, size matters ;)

Graph patterns have so many uses: cross-stitch, latch hook, crochet, knit, perler beads..... what have I missed??


Now, go get hookin'!!!

A BIG 'Thank you!' to MNE Crafts, Playin' Hooky Designs, and Oikos Handmade for their amazing patterns and designs!


    Tuesday, January 6, 2015

    Adding Bugs To Science

    While browsing Etsy, many moons ago, I ran in to this great little shop called 

    Obviously, I immediately fell in love with the butterflies! In fact, the first item I 'favorited' was the large butterfly terrarium for weddings. There are so many different species, colors and beauty in just the butterflies alone!

    BUT, that's not why we are here! No, no! We are here to share our first purchase. One of many to come since it was such a big hit. 

    Are you ready??? It may be scary.......


    The Horned Beetle!


    The Horned Beetle was my first pick as a Christmas present, inspired by one of our favorite movies, 'A Bug's Life.'


    Big C LOVES him! Telling me, and anyone who will listen, everything he learned about this guy from the included information pamphlet. 

    I have to say, I learned a few things too....


    My favorite part, besides the learning, was how he arrived to us. All packaged neatly with his little attachments and decorations.


    It was *lots* of fun creating his home for him.


    And now he sleeps with Big C, in the corner of his bed, always in a cool dark place ;)

    We have already gone through The Amateur Naturalist site together and picked out our next bug!!

    I definitely recommend these terrariums for any nature enthusiast, someone who likes bugs, for learning at home, or just because it's pretty cool to have bugs!

    Thursday, January 1, 2015

    It's a New Year ~ GIVEAWAY!!

    Welcome to 2015 everyone!!

    Let's start the New Year with a new blog post & why not a *GIVEAWAY* while we're at it!
    (Open to US residents ONLY!)


    The hooded towels were my hottest item last year, so I've decided to do a giveaway featuring them.


    **ANY** hooded towel is up for grabs.
    (ONE towel per winner!)


    I have made entering the giveaway pretty easy...... at least I hope so :)

    There are 5 ways to enter, each one equals 1 (ONE) entry.

    That's 5 chances to win!!


    Here's how to enter:

    1. Comment on this blog post.

    (If you already "like" the page, you're automatically entered!)

    3. Like the Facebook post about the giveaway.
    Found here!!

    4. Comment on the Facebook post about the giveaway.

    5. Share the Facebook post about the giveaway.
    (Make sure you share the *original* Facebook post to receive your entry!)


    The giveaway ends on January 14, 2015 @ 11:59 PM Pacific.

    2 (TWO) winners will be chosen and contacted on 
    January 15, 2015.

    Good luck & HAPPY NEW YEAR!!